How to contribute to the OACT website
Any members can contribute news items to the OACT website using the following simple steps:
- Log in to the website with your username and password. (If you don't have a username, just "Register" to create one yourself.)
- Click on the "Add Item" button at the bottom of a news item. The “Add News Item” page will then be displayed, as shown below:
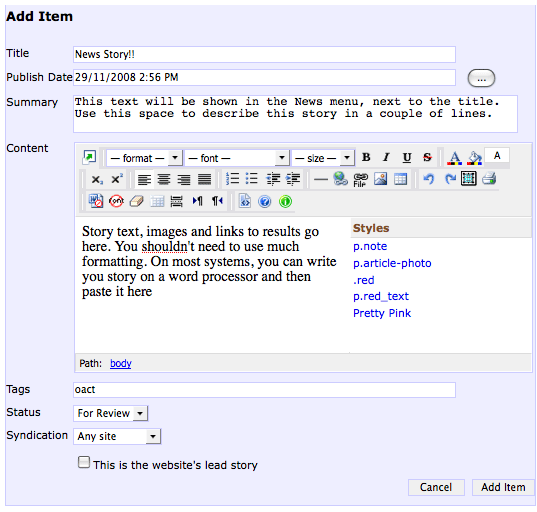
- Enter text into the 3 text boxes as follows:
- Title. The first box is for the title text, and this will be displayed both in the story summary and as a headline in the story window.
- Summary. The second box is the summary text – this should briefly describe the article, and may be the first paragraph from the story; note that the summary text is only shown in the story summary, and not in the story page.
- Content. The third box is for the story, and should contain all the text, pictures, links etc. which make up your news item. There are some further details on how to use the editing tools for your story below.
- At the bottom of the page you will need to add a "tag" -- for OACT news items this tag is simply "oact".
- Under status, select "For Review" and then click the "Add Item" button to submit your story. You can review your story at any time by clicking the "My Articles" link in the Login box.
- Finally, email one of the OACT website editors, and they will check your story and post it on the website.
Formatting your story
The editor which is used for item content works in much the same way as a standard word processor. Below is a list of the main functions and how to use them. Note that for news items, many of these functions are not needed.
| 
| Maximise editor - gives you a much larger window to work with.
|
|  | Bold, italics, underline and strikethrough can be used (sparingly) for emphasis when required. |
|  | Numbered lists and bullet points are useful tools. Don’t worry if it doesn’t look so good in your text box – it will still probably be OK on the final html page. |
|  | These are the most commonly used buttons: link to html, insert image and link to file. See full descriptions below. |
| 
| Switch to HTML. Don’t use this tool if you’re not familiar with HTML. But if you are, this can be an efficient way to submit information, particularly if you’re using tables: you can assemble the page in html on your home machine, and just copy and paste into the box (but watch out for text formatting and links!) |
Adding Pictures
You can easily upload an image or photo onto your story. Remember – keep images small - preferably 40 kb or less and about 300*400 pixels. If you have a large image, this can often be reduced using your camera software, iPhoto or Adobe Photoshop using the "sve for web" option.
Inserting an image in your story is a several stage process:
- Click on the “Insert/Modify Image” button --
 -- to bring up the window shown below:
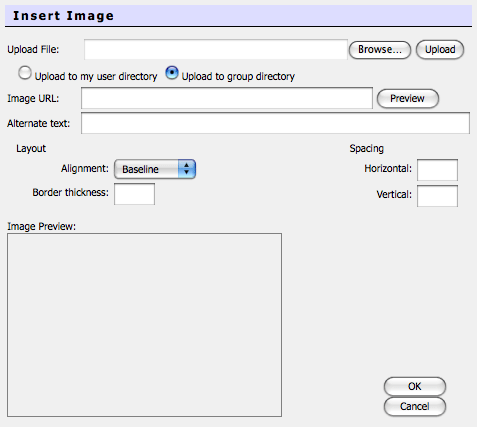
- “Browse...” and find the relevant image file on your local disk;
- Press “Upload” and wait a little while;
- When the image URL is displayed, press “Preview” to see the image;
- Select the alignment under “Layout” – selecting “Right” is most recommended, and allows text to wrap around the image.
- Press “OK” – your image should be displayed and can be resized as you see fit.
Adding Links:
When inserting a link, select the text to be linked and press the “Insert/Modify Link” button ( ). The window below is the result:
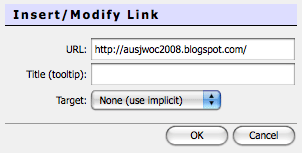
you need to simply add the URL to be linked and press "OK".